Wednesday 21 December 2011

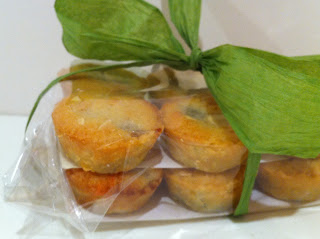
Hazelnut Biscotti.

These were a last minute addition to one of my hampers. We always have masses of hazelnuts at home as there is a large tree in the garden so this seemed like a good excuse to utilise some of them.

250g plain flour
175g caster sugar
1/2 tsp baking powder
2 medium eggs
1 tsp vanilla extract
pinch of salt
zest of 1/2 orange
100g whole hazelnuts
1/2 tsp ground cinnamon


Preheat the oven to 190C/fan 170C/374F/gas mark 5. 


Put the flour into a large bowl, then add sugar and baking powder, and a pinch of salt. Make a well in the center and stir in beaten eggs, vanilla extract, orange zest and hazelnuts.
Make a long thin shape with the mixture on a non stick baking tray.


Bake for about 20-25 minutes until pale golden and set.

Transfer the log to a chopping board and slice into 1cm thick slices, use a serrated bread knife.

Put sliced biscotti back onto the baking sheet and return to oven for 10 minutes until golden and dry. Leave them on a wire rack to cool and harden.

The recipe I based these on came from the Yummy-coffee-and-food blog.

Mince Pies.

When I was little I used to love making mice pies as they were one of the few things we actually made at christmas. My mother never bothered with a Christmas cake or pudding. However as an enterprising eleven year old I thought I would try and sell my mince pies one christmas. From an economic point of view this went very well unfortunately over 100 dozen later I never wanted to see another mince pie. I still make a few batches every year now but try to keep to to a minimum. In our house we have always made mini mince pies and I have two fantastic trays from the Pampered Chef. Each tray takes two dozen and a batch of my pastry should make four dozen or two trays worth. I would advise anyone to invest in this particular tray especially over the lakeland plastics one. The lakeland one is not non stick and the sides are so steep that it is often a nightmare to get the pies out without destroying them in the process. The pampered chef trays are still non stick despited being nearly ten years old and work every time. 


Normally I would agree with the adage that you roll out sweet pastry in icing sugar rather than flour. But with mini mince pies while the sugar caramelising looks beautifully crispy and golden  you cannot get them out of the tin in one piece.


I always use the same recipe for sweet pastry I'm not sure where it originally came from but it is now engraved on my brain I have made it so many times. I can't understand how people to seem to have such problems with pastry. To make this shortcrust pastry all you do is put everything in the magimix and turn in on.


Sweet Shortcrust Pastry


8oz Plain Flour
5oz Butter
2oz Icing Sugar
1 Egg Yolk
Zest of an Orange
2Tbsp Orange Juice
Pinch of salt


Put all the dry ingredients in the magimix and pulse until you have a bread crumb texture. If you don't have a blender rub the butter into the dry ingredients. Then add the egg yolk and enough orange juice to bring the pastry together into a dough. I would advise allowing it to chill in fridge for half an hour or so before rolling out as it will make it easier to work with.


If you are using this pastry for a summer tart you can use water and vanilla or lemon zest and juice.


I usually make my own mincemeat and then top this with pastry stars but this year I have been finishing up all sorts of odds and ends of mincemeat so thought I would try and add something new to my mince pies. I have read about topping mince pies with frangipani so thought I would give this a go.


Frangipani Topping

200g unsalted butter
200g caster sugar
200g ground almonds
50g flour
2 large eggs
2 tbsp brandy
Flaked almonds to decorate and icing sugar to dust

Beat butter until very soft, in food mixer with paddle attachment, gradually add sugar and ground almonds. Mix in flour, then eggs and lastly the brandy.

Fill casing with mincemeat then pipe the frangipani or smooth it on with a spoon. Sprinkle with flaked almonds. The ratio of frangipani to mince meat is totally up to you. I used the same amount of mince meat I usually use and then piped a thin layer of frangipani on top. This meant that the almond taste was not very strong but created a thin crisp layer on the top which sealed in the moisture.

Bake for about 25mins till golden brown and dust with icing sugar. The ones without the frangipani cook much quicker than the ones with it.


The recipe I followed was from Molly's Kitchen. I halved this quantity.


Sunday 4 December 2011

Double Chocolate Chip Cookies.

The great food blogger cookie swap.
I have blogged about entering this event before, as I have been trying to perfect my attempts at cookie making in the lead up to the swap, they have never been my strong point. I was very pleased with the results in the end, I made double chocolate chip cookies from a Nigella recipe which worked perfectly. My biggest problem was defending them so that there would still be three dozen left to post. I wrapped them up like so in greaseproof and rafia.


Ingredients:


125g dark chocolate
150g flour
30g cocoa
1 teaspoon bicarbonate of soda
1/2 teaspoon salt
125g soft butter
75g light brown sugar
50g white sugar
1 teaspoon vanilla extract
1 egg
350g chocolate chips

Method:


Preheat the oven to 170°C.  Melt the 125g dark chocolate. Put the flour, cocoa, bicarbonate of soda and salt into a bowl. Cream the butter and sugars in another bowl. Add the melted chocolate and mix together.
Beat in the vanilla extract and egg, and then mix in the dry ingredients. Finally stir in the chocolate morsels or chips.


The recipe says that this should make 12 but I have always found that it makes more like 18. Place the dough onto backing trays about 6cm apart. Cook for about 20minutes. A skewer should come out semi clean. Leave to cool slightly before moving to a wire rack in order to firm up.


These were the cookies which I received during the cookie swap: 


These were minted triple chocolate cookies. They were absolutely delicious but not what you were expecting at all when you bit into them. They were made with fresh mint rather than peppermint, which is a flavour I shall have to experiment with more. They were beautifully presented and survived the postage perfectly. They were sent by flex your food.


My last two batches of cookies arrived in the post today. Both survived their experiences of the royal mail delivery system and I must remember for next year that a pringles tube makes a very sturdy cookie container. The first batch did not contain any information as to what I should call them but I would describe them as a chocolate covered sugar biscuit. The chocolate that they were dipped in contained some kind of spices which left a wonderful flavour at the back of your mouth without being overpowering. I think it may have been chilli chocolate.They were kindly sent by Mrs Iles.

The final batch came from who was very worried that cookies were not her area of expertise she needn't have worried. They were yummy. They were white chocolate, macadamia and sour cherry. They were not straight flour but split with oats which made them feel healthier! They were kindly sent by Baking Making Etc.


Friday 2 December 2011

Candied Orange Peel.

I have tried to make this before and failed. However, they are one of my Father's favourite things so I can't really make him a hamper and not include them. Last time I made them I used the recipe out of the Ballymaloe cookbook which was a complete kerfuffle it took days of soaking peel and sticky sugar syrup all over the kitchen. So this time I did a bit of reading around on other blogs to see what other people do. They turned out really well this time and I have now used his recipe repeatedly.


Ingredients:


1 cup Water
3 cups Sugar
4  Oranges
Sugar or chocolate to decorate


Method:


Quater the oranges length ways and take out all the fruit. Some people say to take out all of the pith I left it on. Next Blanch the skins by bringing them to the boil in a pan of water.Drain them and repeat three times. This is meant to take out some of the bitterness. Now that the skins were soft I used a teaspoon to scrape out any remaining fruit and some of the pith from any of the particularly thick ones. Cut them up into strips about one cm thick. Put the water and the sugar together over a low heat until the sugar has melted. Once it has melted bring it to the boil and add the peel. Reduce to a simmer. For about ten minutes then leave them in the syrup at least over night but preferably for a couple of days. Then you take them out of the sugar syrup and leave to dry out on a cooling rack. While some of them were still sticky I rolled them in granulated sugar the rest I continued to let dry before dipping in chocolate. The ones coated in chocolate kept fresh much better than the ones in sugar.


Thursday 1 December 2011

Scottish Tablet


I started this blog merely as I record of what I have cooked and so that I would be able to access my recipes anywhere in the world. I have always hated writing so thought that his was going to be a bit of a chore but the more I blog the more I enjoy it. There is this whole community of cooks out there just waiting to share their knowledge and experience. I have blogged before about how it is a shame that the WI is so out dated in its format. I suppose blogs are the new WI and it is events such as lets make Christmas which take us from the virtual to the physical. 


Tablet is a scottish fudge but it is much harder and melts in your mouth rather then needing to be chewed. It is another item heading towards my christmas hampers, I am trying to wrap everything inside them to the same theme green raffia, brown greaseproof and pink parcel paper.


Life in our flat has been made marginally more dramatic this week by one of the flatmates deciding he and a friend were going to put her head and his had through one of our glass doors. Lets just stay this was not one of their wisest moves. Consequently he now needs surgery to put the tendons in his hand back together, not the best timing when his exams start on monday.Although on a selfish note I am rather enjoying not being the cripple for once. I broke my arm very badly and everyone spent the summer laughing at me for being incapable (Someone had to do my bra up for me for two months). Now he is the one who can't put the tooth paste on his brush and has to have his food cut up.


Ingredients:


1 pint/500ml water
8oz/225g butter, chopped into pieces
4 lbs/1.8kg caster sugar (golden gives it more colour)
400g tin of condensed milk

Preparation:


In a heavy based 4-pint sauce pan heat the water to a low simmer then add the butter. Stir until melted. Add the sugar and stir until all the sugar has dissolved. Raise the heat to high and bring the sugar to a hard boil for 5 minutes (the mixture should boil really fiercely which helps to reduce the liquid and colour the mixture) stirring all the time to prevent the sugar from sticking and burning. If you have a thermometer take the temperature to 120°C.

Once the sugar is boiling, slowly add the condensed milk. Stir well then lower the heat and simmer for 20 mins. The mixture will bubble and also start to slightly darken.

After twenty minutes remove the pan from the stove and beat the mixture (I used an electric whisk) vigorously for 5 mins.

Pour into the greased pan and when the tablet is cool but still soft, cut into 1" squares. Once completely cold wrap in greaseproof paper and store in an airtight tin. The recipe said to use a 7'' square tin which I followed but would not advise this makes thick tablet which can only be cut into very large pieces I would use a tin double this size. More like a baking tray or a swiss role tin. This aside I was very pleased with the outcome of this recipe. Beware it does make and awful lot this recipe.