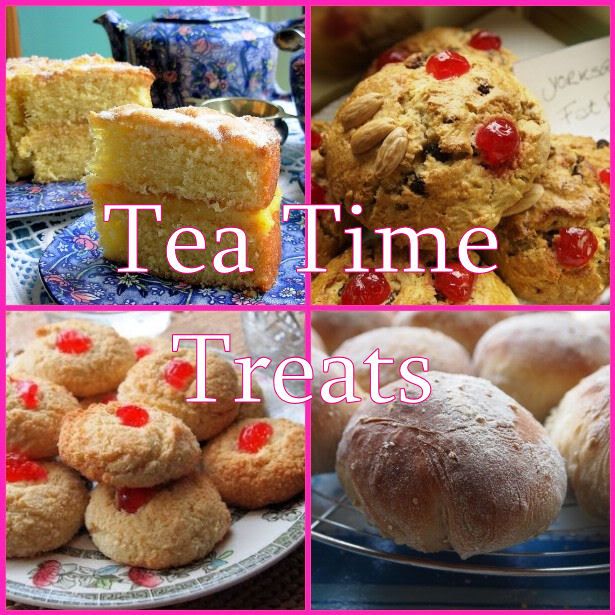
This is my mother's favourite cake and such a classic that I thought it wise to have a fool proof recipe. I went with a Nigella one which worked beautifully, I particularly liked the addition of walnuts into the sponge as well as for decoration.
Sponge:
50g walnut pieces
225g caster sugar
225g soft butter
200g plain flour
4 teaspoons instant coffee powder
2 1⁄2 teaspoons baking powder
1⁄2 teaspoon bicarbonate of soda
4 eggs
1 tbsp milk
Buttercream icing:
350g icing sugar
175g soft unsalted butter
2 1⁄2 tps instant coffee, dissolved in 1 tbsp boiling water
25g walnut halves, to decorate
2 x 20cm sandwich tins
Serves: 8
Preheat the oven to 180C or 160C in a fan oven. Butter the 2 sandwich tins and line the base of each with baking parchment.
Put the walnut pieces and sugar into a food processor and blitz to a fine powder. Add the butter, flour, coffee, baking powder, bicarb and eggs and process to a smooth batter.
Add the milk next, it should end up at dropping consistency, this is where it liquid enough to dollop of a spoon but solid enough not to be considered a liquid. If it is very stiff add some more milk.
Divide the mixture between the 2 lined tins and bake in the oven for 25 minutes.
Cool the cakes in their tins on a wire rack for about 10 minutes, before turning them out onto the rack and peeling off the baking parchment. Make sure you do leave them in the tins as the sponge is very soft and is likely to crack.
Dissolve the instant coffee in 1 tablespoon boiling water and add it while still hot to the butter and icing sugar. Beat until you have a smooth paste.
I have linked this up to Forever Nigella over on Home made by fleur on behalf of Maison cupcake.
Showing posts with label Cakes. Show all posts
Tuesday, 5 June 2012
Sunday, 6 May 2012
Marbled Bundt Cake.
I have always read bundt cake recipes some what enviously, not having a suitable cake tin I have never been able to attempt them. However this has all changed and I could resist no longer, so I indulged myself by investing in my very own bundt tin. Having purchased said tin I immediately started looking for recipes with which to christen it. There are so many delicious bundt recipes out there that I was spoilt for choice, however I must admit that I chose this one as we already had the requisite ingredients in the cupboard.
3 cups plain flour
2 tsp baking powder
½ tsp salt
2 ½ cups granulated sugar
½ cup cocoa powder
6 tbsp water
1 ½ cups butter, melted
1 ½ tsp vanilla extract
5 large eggs
½ cup milk
6 ounces chocolate
⅔ cup cream
Sift flour, baking powder and salt into a bowl. In a separate bowl add in ½ cup of sugar, cocoa and water; whisk until mixture is smooth. Beat melted butter, vanilla and sugar for about a minute. Add eggs one at time, mixing well after each addition, then continue to beat for a couple of minutes.
Add the flour and milk in three stages alternating between the two. Add the cocoa mixture to two cups of the cake batter and stir. Now spoon the mixture into the tin alternating between the two mixtures.
Bake for 50-60 minutes at 175C.
To make icing place cream in the microwave for a minute or so, then stir the chocolate into it to melt. Pour over the cake.
Tuesday, 3 April 2012
Banana Loaf.
This is a recipe which is ingrained on my mind. At school we used to have fruit bowls in the boarding houses; in the bottom of which there was always a black banana or two, which everyone refused to eat. This offend me greatly so matron would provide me with the ingredients and I was regularly to be found in a free period, when I should have been studying making banana loaf. In a boarding house of sixty girls they never lasted long enough to get cold! Let alone toasted.
This original recipe which this is loosely based on comes from the magimix cook book, throw it all in and press on. It is therefore quite a forgiving batter so great for when you have small helpers. At the request of the Musician I have also included an optional extra 100g chocolate chips in this loaf.
225g Flour
75g Soft butter
175g Caster sugar
2 Large ripe bananas
2 Eggs
1 tsp Baking powder
2 tbsp Milk
100g Chocolate chips optional
Pre heat oven to 180C or 160C for a fan oven. This quantity fills a 2lb loaf tin. Grease the tin well and dust with flour. Mash the bananas. Stir together all ingredients and bake for 1hr or until a skewer comes out clean.
I have linked this up to Family Friendly Fridays.
Monday, 2 April 2012
Lemon and Blueberry Muffins.
For the last six weeks I have been conspicuous by my absence on all forms of social media. The only recipe I have blogged about in the last month was not even cooked by me! This morning I handed in my dissertation, all 14,588 words and 128 pages. Consequently baking shall now resume in ernest.
Anyone who has ever written a dissertation or the like, will agree that you have so much time and emotion turmoil invested in it, that when hand in day arrives you feel somewhat as if you are giving over a small child. I may have portrayed a calm facade to my flat mates, as I lay awake ever fearful of my recurring nightmare, printers wantonly devouring my dissertation (the musician will attest to the fact that my printer and I are not the best of friends) but there are two people out there who know the truth. They found the process of my dissertation equally if not more trying than I did. They patiently attempted to explain the difference between a colon and semi colon, that the bibliography goes surname, initial. etc and that no my computer doesn't always know best when it comes to spelling. So in honour of my wonderful editors I thought that I would begin by baking something to post-able as a small thank you. Hence lemon and blueberry muffins.
1 3/4 cups flour
3/4 cup
2 teaspoons baking powder
3/4 teaspoon salt
1 cup blueberries
2 large eggs
1/2 cup milk
1/4 cup vegetable oil
Finely grated zest of 1 lemon
1/4 cup fresh lemon juice
This makes 12 muffins I would suggest using large muffin liners not cup cake cases as these do over flow slightly. Pre heat the oven to 190C. Mix all the dry ingredients and the fruit in one bowl. At this point you to have lined or greased your tins and be prepared to move quickly. Whisk together all the wet ingredients in another. Once you add the lemon juice to the milk it curdles don't worry its meant to. Add the wet ingredient into the dry, the mixture will start to rise slightly as the lemon reacts with the baking powder so you need to fold the mixture not stir and get it into the oven as quickly as possible. Bake for 20mins until golden brown on top.
Thursday, 9 February 2012
Mississippi Mud Brownies.
I saw this recipe on an american blog which I stumbled across and thought that they looked amazing. I have adapted the recipe slightly to make them less sweet than the american version. I can testify that they taste as good as they look. Whilst I was making them I almost backed out fearing that the peanut butter was going to be gilding the lilly but it really works as the peanut balances out the slightly sickly taste of the marshmallows.
¾ cups Flour
3 Tbsp Cocoa
½ Tsp Salt
125g Butter
1 cup Granulated Sugar
¾ Tsp Vanilla Extract
2 Eggs
100g Chocolate Chips
½ cup Crunchy Peanut Butter
2 cups Marshmallows Mini or Large
½ cups Chopped And Toasted Pecans
150g Chocolate
Preheat oven to 180C. Line an 8×8″ square baking pan with parchment paper. Combine flour, cocoa powder, and salt.
In another bowl, beat together butter, sugar, and vanilla until creamy. Add the eggs one at a time. Stir dry ingredients into batter. Pour batter into prepared tin and spread evenly. Sprinkle with chocolate chips. Bake in preheated oven for 22-25 minutes.
When brownie is done, put peanut butter in the microwave to soften. This does seem like a lot of peanut butter but don't worry it does work. Pour this warm mixture over hot brownie and spread. Sprinkle the peanut butter covered brownies with marshmallows. Return to oven to bake for 3 more minutes, or until the marshmallows puff. Remove from oven and sprinkle puffed marshmallows with toasted pecans. Let the marshmallow cool. Then pour over melted chocolate and leave to set. When it comes to cutting them up in order to serve use a hot knife to melt though the chocolate and marshmallow as this will give you neater sides.
Sunday, 29 January 2012
Chocolate Whoopie Pies with Marshmallow Icing.
It is the musicians 21st birthday so she and a friend thought it would be a good idea to throw a party. Subsequently 60 bottles of cava have arrived in our flat to help the festivities along. Now an occasion such as this cannot pass by without cake, however, I have visions of 100 portions worth of cake crumbs being liberally spread around the flat not to mention the icing. I wanted something to make an impact when carried in with cake fireworks on the top so a tray bake or the like was out (this turned out to be a bad idea as the fireworks set off every smoke alarm in our flat). I contemplated cupcakes but they have been done now and only really look good when displayed on cake stands which we don't have. So I settled upon whoopie pies. These seem to be the new thing. If you have never heard of them before then the easiest way to describe them it that they are like the top half of two muffins sandwiched together with some form of icing.
I decided to make three different flavoured varieties chocolate, chocolate and peanut butter and red velvet. I am only going to write up the chocolate ones at the moment but I will make the other ones again at another time. I will say though that they batters of each of the three varieties behaved slightly differently.
I followed the basic recipes in the Hummingbird cake book but have deviated with the icing as I didn't want to have to spend a fortune on fluff for the filling. I made one batch of the icing following the recipe and must admit that it was the best. I do love fluff it is just that it is £2.40 a jar in England and each batch of icing needs a whole jar. My attempts to replace fluff with melted marshmallows needs some more experimentation I fear. I would also suggest trying the marshmallow icing from the Primrose book as an alternative.
The photos of the ones I made for the party aren't very good as I suddenly realised I hadn't taken any pictures just as we were about to sing happy birthday. They were such a success that I have had to make another batch this weekend as my flatmates didn't manage to get to them in time. I had been reading about new ideas for valentines day and thought that as I was having to make another batch anyway I might as well have a go at piping them into hearts. I also added pink food colouring to the icing. They looked fantastic if I say so myself and I would advise piping all whoopie pies in the future. They looked much neater and it was much easier than trying to spoon out a sticky batter.
I have entered them into Cake Boule valentine baking ideas and Valentines hearts ideas on very good recipes.
Ingredients: For the Sponge
1 large egg
150g (5.5ozs) Caster Sugar
125g (4.5ozs) Plain yoghurt
25ml (1fl oz) whole milk
¼ tsp vanilla essence ( I used nomu paste)
75g (2.5oz) melted unsalted butter
200g (7oz) Plain Flour
80g (3oz) Cocoa Powder
¾ tsp bicarbonate of soda
¼ tsp baking powder
Filling:
170g (6oz) unsalted butter
280g (10oz) icing sugar
220g (8oz) vanilla marshmallow fluff
Method:
Using a mixer cream the egg and sugar until fluffy. Pour the milk, yoghurt and vanilla essence into a bowl and mix together. Then add this mixture in with the beaten egg an sugar. Finally add in the melted butter and mix. Sift together the remaining dry ingredients, add them to the creamed mixture and mix well on a medium speed. Place the batter mix in the fridge to rest for 20-30 minutes this is important I don't know the science behind it but i imagine the raising agents are reacting and it changes the consistency of the batter. Pre-heat the oven to 170C Roasting oven with a cold shelf. Once rested, spoon or pipe onto the baking trays making 8-10 mounds per tray. These need to be 2-3 cm spaced apart and around 3 -5 cm in diameter. A tsp full is about the right amount if you are spooning.
Bake for 10-13 minutes or until they spring back when touched. Cool before filling.
To make the filling beat the butter and icing sugar together. Once this is blended add the marshmallow fluff and then mix on a high speed until the mixture is light and fluffy. Place in the fridge for 30 minutes as this will firm up the mixture slightly.
I made them the day ahead and they kept very well. They are quite robust so would travel well if need be I imagine they could be posted as well.
I have entered them into Cake Boule valentine baking ideas, Valentine Hearts ideas on very good recipes,Baked with love bakeoff and What Kate Baked's Tea Time Treats.
Tuesday, 24 January 2012
Coffee and Chocolate Loaf.
This is the first thing which I have baked out of my new Hummingbird book which I got for christmas. I particularly like loaf cakes as they keep very well. I made this in a 1 lb loaf tin.I have adapted this recipe.
Ingredients:
190g unsalted softened butter
130g plain flour
190g soft light brown sugar
3 large eggs
60g cocoa powder
1 teaspoon baking powder
20ml milk
1 tablespoon strong coffee (brewed and cooled)
Method:
Pre-heat the oven to 170°C this is a particularly difficult temperature in a two door aga so I did it in the electric oven but I would suggest the bottom of the top oven with two cold shelves. Then grease and flour your loaf tin.
Cream the butter and sugar together until pale and fluffy. Use and electric whisk or a mixer to make this. Add the eggs one at a time and mix well. The mixture should be quite fluffy and almost 'moussey' when you have finished.
Measure the milk and add the cooled coffee to it. Set aside.
Add the dry ingredients and two batches, alternating with the coffee mixture. Mix on a low speed until everything is incorporated.
Once everything is well mixed, increase the speed to medium-high and give a quick blitz to make sure you have a smooth batter. This mixture is not very liquidy and is more like a regular sponge batter. Spoon into the tin and bake for one hour or until a knife comes out clean when inserted into the middle of the cake. Allow to cool for a while in the tin before turning out onto a wire rack to cool completely.
I would love to know how to stop the top of my loaf cakes cracking if anyone has any advise.
Wednesday, 18 January 2012
Devil's Food Cake.
Baking this cake was an opportunity to hit two birds with one stone so to speak. It meant that I could join in with a new virtual baking group the Weekly Bake Off and I could subtly gage the musicians reactions to the sponge before I adapt it for her 21st birthday. She has requested a light chocolate sponge layered with raspberry jam. So am thinking I will use this sponge as a cupcake base and ice it with raspberry marshmallow icing for which there is a recipe in the primrose bakery book. Anyhow back to the bake off the weekly bake off's host chooses one recipe every week from Mary Berry's 100 cakes and bakes which everyone uses and then we all post photos of our differing results. It never ceases to amaze me how you can have such varying results with everyone following the same recipe.
I will admit that mine was not the most proficient thing that I have ever made. One of the difficulties of baking in a student flat is that I rarely have the required ingredients or equipment. I managed to borrow the pair of sandwich tins off a friend. They were the seemingly clever ones with the twisty thing to cut the cake of the bottom of the tin. This was disaster two, despite greasing the tins they were resolutely stuck to the bottom. Disaster one involved the mixture overflowing all over the bottom of the over, which lets face it I haven't subsequently cleaned so every time we now use the oven the flat is filled with a pungent smell of burnt cake mixture. My third difficulty was a lack of either cream of tartar or a thermometer in order to make the icing. In the end the sponge was delicious, one I will definitely be using as a base for other cakes. The icing also worked well and looked very smart but it was far too sweet a combination with this sponge. I would suggest not to make the icing too far in advance as it was nicer when it was softer and more marshmallowy rather than the dry meringue texture which it took on the next day. It was also irritating that one egg whites worth of icing
was not quite enough but two was far to much. Found that if you gave the icing in the middle a couple of minutes to firm up before putting the top sponge on it gripped better.
For the cake:
55g cocoa powder
280g caster sugar
115g butter
2 eggs, lightly beaten
175g plain flour
1/4 teaspoon baking powder
1 teaspoon bicarbonate of soda
For the American frosting:
450g sugar
2 large egg whites
Preheat the oven to 180C.Grease and line 2 x 20cm sandwich tins.
Whisk the cocoa powder into 225ml water and set aside. Whisk the sugar and butter in a separate bowl until light and fluffy. Add in the eggs until well combined. Sift the flour, baking powder and bicarbonate of soda into a bowl.Alternately fold in the flour and the cocoa mixture to the butter mixture. Divide the batter evenly between the tins.Bake for 30 - 45 minutes until well risen and firm to touch.
To make the frosting, heat the sugar with 135ml water gently until the sugar has dissolved. Next, bring it to a boil and boil until it reaches 115C/240F on a sugar thermometer. The mixture will bubble and thicken. Whilst you are heating the sugar, whisk the egg whites until stiff. Once the sugar syrup is ready, allow the bubble to settle then pour slowly into the egg whites, whisking constantly. Continue whisking until the mixture stands in peaks.
Alternatively simply whisk the egg whites, sugar and a couple of tbsp of water together in a double boiler until you have the required consistancy.
Wednesday, 30 November 2011
Glendoe Fruit Cake.
Christmas cake often has a bad reputation not only because fruit cake is very out of fashion at the moment but also because rumour says that we must make it months in advance and it still often ends up being very dry after all that time and effort. Whilst I will not dispute the fact that you can get more flavour into a cake if you have let it mature and continued to feed it with alcohol for a few weeks before icing but that does not mean that it is a compulsory stage of the process.
This fruit cake recipe can be made and served on the same day. It fits into a nine inch round tin or an eight inch square tin. This year I made multiple fruit cakes as I put them into my christmas hampers. The square tin is good for hampers as you can cut it up to share between multiple hampers. Mary Berry suggests baking individual fruit cakes in old baked bean tins which is something I will definitely be trying in the future.
I like to decorate my cakes with fondant icing as a base than then pipe royal icing decorations over the top.
This year was the first time that I tied news paper around the cake tin whilst it baked. Having always thought that it was a waste of time I will admit that it did make sure that the cake much more evenly throughout. If you have time I would suggest it but it is not necessary but I would suggest it you don't wrap the tin then you will need to keep a closer eye to the top of the cake as it cooks.
Ingredients:
770g Sultanas
310g Raisins
180g Currants
150g Cherries
250g Prunes
130g Mixed Peel
100g Stem Ginger
3TBSP Marmalade
1TBSP Cocoa
1TSP Mixed Spices
1TSP Cinnamon
1/2 TSP Nutmeg
1/2 TSP Ground Clove
Zest of two clementine
Zest of a lemon
1TBSP Golden Syrup
1TBSP Treacle
9fl oz Brandy
250g Butter
230g Soft Brown Sugar
4 Eggs
250G Flour
60g Self Raising Flour
Method: If you have time then put all the fruits, spices and brandy into a bowl together cover and leave over night. If you don't have time don't bother. Preheat the oven to 150c or in a two door aga use the bottom oven. Cream the butter and sugar together. Then add the eggs one at a time. Next mix in the flours and the fruit. Put the mixture into a lined tin. Bake for 3.25-3.5hrs or until a skewer comes out clean.
If you are not serving it immediately then every few days or so make small holes into the cake with a cocktail stick and spoon over more brandy to taste.
Tuesday, 29 November 2011
Banana Muffins.
Three black bananas in the fruit bowl need I say more. This was a new recipe for me as my bananas loaf recipe makes very heavy muffins. These were extremely light and very delicious.
Ingredients:
200g (7 oz) plain flour
1/2 teaspoon baking powder
1 teaspoon bicarbonate of soda
1/2 teaspoon salt
3 large bananas, mashed
150g (5 oz) caster sugar
1 egg
75g (2 1/2 oz) butter, soft
Method:
Preheat the oven to 180C or roasting oven with a cold shelf. This makes 12. Combine mashed bananas, sugar, egg and melted butter in a large bowl. Sift together the flour, baking powder, bicarbonate of soda and salt. Fold in flour mixture, and mix until smooth. Bake for 25-30 minutes until golden.
Black Bottom Cupcakes.
Ingredients:
Cheesecake Filling:
225g Cream Cheese
1/3 cup Granulated Sugar
1 Egg
1/2 tsp Vanilla Extract
60g Dark Chocolate Chips (optional)
Chocolate Sponge:
1 1/2 cups Plain Flour
1 cup Granulated Sugar
1/3 cup Cocoa
1 tsp Baking Soda
1/4 tsp Salt
1 cup Water
1/3 cup Sunflower/Canola/Vegetable Oil
1 Tbsp White Vinegar
1 tsp Vanilla Extract
Method:
1 cup Granulated Sugar
1/3 cup Cocoa
1 tsp Baking Soda
1/4 tsp Salt
1 cup Water
1/3 cup Sunflower/Canola/Vegetable Oil
1 Tbsp White Vinegar
1 tsp Vanilla Extract
Method:
Preheat oven to 180°C or roasting oven with a cold shelf. This makes 12. Beat cream cheese until smooth. Add sugar, egg & vanilla then beat until combined. Mix in chocolate chips if you're adding them.
Sift together flour, sugar, cocoa, baking soda and salt. Make a well in the centre of the dry ingredients and pour the wet ingredients into it. Stir to combine and mix until smooth.
Divide chocolate batter evenly between cupcake liners. Drop a spoonful of the cheesecake batter on to the chocolate batter in the middle. Bake for 20-25 mins.
Sunday, 20 November 2011
Easy Sticky Buns.
I have been meaning to make these for a while after seen Ina make them on the barefoot contessa and as we have a whole host of people coming to stay for the weekend this seemed like a good opportunity. I found the actual recipe on Gimme some oven but it is the one from the show. I love the barefoot contessa but alway baulk at cooking her recipes as although I know that they will be delicious they usually start with a whole packed of butter. I also made some double chocolate chip cookies but they did not last long enough for me to get a photo so I will have to make them again later.
Ingredients:
1/3 cup light brown sugar.
1/2 cup pecans or walnuts, chopped in very large pieces.
1 pack puff pastry, either pre rolled or rolled to about 1/4inch thickness.
100g Butter.
2/3 cup light brown sugar, lightly packed
3 tsp. ground cinnamon
1 cup raisins (optional)
12 cup muffin tin.
Ingredients:
1/3 cup light brown sugar.
1/2 cup pecans or walnuts, chopped in very large pieces.
1 pack puff pastry, either pre rolled or rolled to about 1/4inch thickness.
100g Butter.
2/3 cup light brown sugar, lightly packed
3 tsp. ground cinnamon
1 cup raisins (optional)
12 cup muffin tin.
Method:
Preheat the oven to 200C or the second shelf of the aga roasting oven. Make sure butter is soft then mix it with the third of sugar until it is a paste. Split the mixture between the bottoms of the 12 muffin pans. Distribute the nuts between the pans on top of the sugar and butter.
Roll out the pastry. Sprinkle the rest of the sugar over the pastry with the cinnamon. At this point you can add any combination of more nuts or raisons that you fancy. Roll the pastry back up with the sugar etc inside. Next slice the roll up into 12. Place each swirl with the swirl facing up into one of the pans on top of the nuts and butter.
Bake in the oven for about 30mins. Once out of the oven leave to cool for about 5mins then up turn the whole pan. You should probably do this onto baking paper or tin foil. Some of the nuts will fall off at this point just put them back onto the top and once the sugar has cooled they will stick.
I am retrospectively entering this recipe into Tea Time Treats which is being hosted this month at Lavender and Lovage and What Kate Baked.
Friday, 4 November 2011
Butterscotch and White Chocolate Blondies.
This year instead of baking as a form of productive procrastination I am only letting myself bake when I have finished my work. I finished my dissertation proposal this afternoon so thought I would spend the evening baking a new recipe. I have read on a number of blogs about people making blondies which seem to be a white chocolate brownies. So I thought I would give them a go this recipe came of the blog jolts &jollies. This turned out to be a great recipe and one I will definitely make them again, my flatmate has already eaten six.
Ingredients:
2 cups unbleached all purpose flour
2 1/2 cups firmly packed light brown sugar
2 teaspoons baking powder
1/2 teaspoon salt
150g unsalted butter
3 eggs
Preheat oven to 180C or in a two door aga the grid shelf in the bottom of the roasting oven with a cold self. Line a 9x13 inch pan roughly the small aga roasting pan. Combine flour, brown sugar, baking powder and salt in large mixing bowl. To brown the butter heat it in a small pan stirring constantly until it goes a light brown colour. Then pull it off the heat and leave it cool in the pan where it will continue to get darker until it looks a bit darker than golden syrup. whisk together the eggs and browned butter. Stir the wet ingredients into the dry ones. Fold in the chocolate chips and spread in the pan. Bake for 30minutes until a knife comes out clean. They should still be gooey in the middle.
Chocolate Mousse Layer Cake.
It was my flatmates 21st this week and I wanted to make something slightly more interesting than sponge but did not have a huge amount of time on my hands. We also have one friend who is allergic to wheat and another nuts. So I decided to start with a chocolate roulade sponge in between which I would layer up different chocolate mousses. chocolate roulade of swiss role sponges are a great one to remember as they have no flour or fat in them.
Roulade:
175g/6oz plain chocolate.
175g/6oz caster sugar.
6 eggs, separated.
2 level tbsp cocoa, sieved.
33cm x 23cm (13in x 9in) Swiss roll tin I never use a tin instead I fold one out of baking parchment.
Preheat the oven to 180C/350F/Gas 4. Melt the chocolate slowly in a bowl over a pan of hot water. Allow to cool slightly. Place the sugar and egg yolks in a bowl and whisk with an electric whisk on a high speed until light and creamy. Add the cooled chocolate and stir until evenly blended. Whisk the egg whites in a large mixing bowl until stiff but not dry. Stir a large spoonful of the egg whites into the chocolate mixture, mix gently and then fold in the remaining egg whites, then the cocoa. Mixing in the spoonful of white may seem like a waste of air but it makes it easier to fold the rest together as the mixtures will now be a more similar constancy. Pour into the prepared tin and gently level the surface. Bake in the preheated oven for about 20 minutes until firm to the touch.
Chocolate mousse:
1oz dark chocolate
1 egg separated.
For the amount of sponge I had made I used 2oz and 2eggs. If I were to make this recipe again I would probably 1.5 times the sponge mixture and use three eggs. Not because there was not enough it easily fed 8-10, but because I was cutting it up to layer it. When you cut something down to size there is always an amount of wastage meaning the amount of sponge was quite tight. Melt the chocolate and allow to cool slightly. Then mix the egg yolks into the chocolate. In a separate clean bowl whisk the egg whites to a stiff peak. Fold the whites into the chocolate remembering to slacken off the chocolate as you did with the roulade. Normally you would now put the mixture into whatever you are going to serve it in and them into the fridge. If I were making this recipe for a pudding on its own the general rule is one egg and one ounce of chocolate per person.
White chocolate mousse:
90g white chocolate.
45ml milk.
1 egg white.
110ml double cream.
Melt the chocolate , stir in milk and set aside. This stops the chocolate ceasing. Whip the egg whites until stiff, then fold into the chocolate mixture until well combined.Whisk the cream until it forms soft peaks and gently fold into the chocolate mixture. This was a Nigella recipe which I had not used before it worked well for this as it was going with other dark chocolate components but it was far too sweet to be eaten on its own.
I assembled it by cutting the sponge into two squares and layering in up sponge, chocolate mouse, sponge and white chocolate mousse on the top. I had to cut squares as I had not made enough sponge but this would have been much easier to do if I had had enough to assemble it in the ring of a cake tin. I would have got a much neater finish as the mixture would have had straight sides. I also finished of the top with fresh raspberries. I will definitely make this again as a smart birthday cake or even just as a pudding. It is quite rich so is probably best served as a pudding rather than as a tea time cake. You could easily use orange chocolate for the mousse and brush grande marnier into the sponge if you wanted to make it a bit different.
Tuesday, 12 July 2011
Cake Pops.
The village fete was this weekend and as such I wash expected to produce a cake for the baking stall. Usually this would be a good excuse to try out some new recipes. However currently our kitchen is a building site and all I have to cook with is a camping stove, a microwave and the George Forman. I therefore decided to try my hand at cake pops which seem to be the 'in' thing to be making.
On this occasion I used a bought chocolate cake and Betty Crocker chocolate fudge cake icing. But in future I think it would be worth using home made icing but I don't think it would worth making your own cake. I also used normal white chocolate rather than candy melts which most recipes advised. Candy melts come in lots of colours and set very quickly to make life much easier. Chocolate worked fine but you did have to be careful with its consistency, to thick and the decorations did not stick to it and too thin and the chocolate simply ran off rather than setting.
Lolly pop sticks.
Cake any flavour you chose.
Butter cream icing of a relevant flavour to the cake you are using.
Chocolate or candy melts.
Decorations I used coloured sugar, hundreds and thousands and mini marshmallows.
Break the cake down to crumbs and stir in enough icing so it forms a dry paste like consistency roll the mixture into balls approx the size of a two pound coin. Remember that they get bigger once you have decorated them. Make a small hole in them with one of the sticks and leave in the fridge. Melt the chocolate dip the end of each stick into the chocolate them place a stick into each of the holes. Return them to the fridge this sticks the pops to the stick to allow for easier icing. Once the chocolate has set dip the pops into the chocolate to coat while the chocolate is still setting decorate them. I then placed them in an old bit of Styrofoam to keep the upright.
As it was my first attempt I kept mine very simple but there are loads of examples of the internet of people being much more creative with their shapes and decorations. I finished mine off by wrapping them individually in cellophane and tying them off with a small bow.
Monday, 27 June 2011
Lemon Tray Bake.
Tomorrow is St Peter's and St Paul's holy day of obligation I have managed to escape church in exchange for making a cake for the congregation. When I am not at university we live in a quintessential English village where the women run a flower and tea roster for the village church. the only thing we are missing is a WI. I am much looking forward to the village fete in a few weeks time as it is an opportunity to try out new baking recipes with no guilt over who is going to eat them or how much my waist line will suffer. I have relied upon a tried and tested recipe from the Mary Berry Aga cook book where she has a section devoted to tray bakes perfect for coffee mornings, fetes and school. It is neither an inspiring recipe nor one that you could not find elsewhere but if you are cooking in an Aga then the quantities are designed for a large Aga roasting tin.
4 Eggs
350g Self raising flour
250g Caster sugar
250g Butter
3 Level tsp baking powder
6 tbsp Milk
zest 2 lemons
for the icing the juice of 2 lemons and either enough granulated sugar or icing sugar to make a thick consistency. I prefer the crunch of granulated sugar but children often prefer the white icing gained from icing sugar.
Pre heat oven to 180C or the grid shelf in the bottom of the roasting oven with a cold self. Simply mix all of the ingredients together and pour into the roasting tin. The mixture does not look like there will be enough but trust me it is. This does make a shallower cake designed to be eaten in fingers. Bake for 25-30 minutes until golden brown. If you are using granulated sugar ice immediately but if you are using icing sugar allow it to cool first.
Wednesday, 22 June 2011
Honey Tea Bread.
I am about to embark on another summer of lodge cooking in Scotland to fund my university education, as such I am researching and trialling new recipes. Lodge food tends to be rather traditional so I don't get much scope to work with but it is always fun trying new things. I also work for a catering company who do amazing canapes, I wish I had more time to make fun canapes. Anyhow back to my next recipe. Honey Tea Bread I have been reading about these on various different blogs. I like loaf cakes as they don't seem to go off as quickly as a standard sponge. When they do start to go stale simply pop a slice into the toaster and add butter, it never fails. This particular recipe appealed to me as there is no refined sugar only honey, no fat and it is also made with whole-wheat flour rather than white.
Ingredients:
225g (8oz) raisins
75g (3oz) set honey
300ml (½pt) freshly made strong tea
2 eggs, medium eggs, lightly beaten
275g (10oz) whole-wheat flour
2.5ml (½tsp)ground mixed spice
15ml (1tbsp) baking powder
Ingredients:
225g (8oz) raisins
75g (3oz) set honey
300ml (½pt) freshly made strong tea
2 eggs, medium eggs, lightly beaten
275g (10oz) whole-wheat flour
2.5ml (½tsp)ground mixed spice
15ml (1tbsp) baking powder
Method:
Pre-heat oven to 180C in a 2 door Aga this is on the grid in the bottom of the roasting oven with a cold shelf. Place the raisins in a bowl. Stir the honey into the tea and pour this over raisins. Leave to soak for 2 hours. Stir the eggs into the raisin mixture.
Mix the flour with the spice and baking powder then mix these dry ingredients into the raisin mixture. Transfer to a greased 900g (2lb) loaf tin and bake for about 1 hour 10 minutes. Mine slightly caught around the edges and I also cooked it for 20minutes less than the recipe required. If you are cooking in an aga I would suggest 30minutes in the roasting oven and then move it down to the simmering oven until it is cooked. It does look like you have burned it but as it is whole-wheat flour it is naturally much darker in colour.
This cake also keeps for about a week before going stale.
Subscribe to:
Posts (Atom)